

How to Migrate WordPress site in CloudPanel
Example: Migrate from a.test.com → b.test.com

Problem Statement
WordPress migration is required when:
Changing domain name but keeping the same website content
Moving from staging environment to production
Example:
staging.test.com → test.comMoving site between server users inside CloudPanel
Rebuilding environment but keeping the same website
This procedure ensures:
Files are transferred correctly
Database remains consistent
No broken links or permission issues
Tools Used
This migration process uses:
CloudPanel – Site and database management
Cloudflare – DNS and SSL management (if applicable)
Terminal (SSH) – File transfer and backup
Code Editor – VS Code / Cursor / any text editor
phpMyAdmin – Database export and import
Backup First (MANDATORY)
Before migration, always perform a full backup of:
Website files
Database
Do not proceed without confirmed backup.
Backup Website Files (Terminal)
Example backup for a.test.com:
cd /home/test-a/htdocs/
zip -r a.test.com-backup.zip a.test.com
Confirm the .zip file is created successfully before continuing.
Backup Database (SQL Dump via Terminal – Recommended)
mysqldump -u DB_USER -p DB_NAME > a-test-backup.sqlEnter the database password when prompted.
You should now have:
Website backup (.zip)
Database backup (.sql)
Only proceed after verifying both backup files exist.
1) Create New WordPress Site (Destination)
Login to CloudPanel.
Create a new WordPress site:
Domain:
b.test.com
Save the following details (needed later):
Database name
Database username
Database password

2) Prepare Destination Directory
Go to File Manager.
Navigate to:
htdocs → b.test.com
Delete all existing files inside the folder
(includingwp-config.php, default WordPress files, etc.)

3) Copy Files from Source Site
Open Terminal and run:
cd /home/test-a/htdocs/a.test.com/
cp -r * ../../../test-b/htdocs/b.test.com/.
cd ../../../test-b/htdocs/b.test.com/
chown -R test-b:test-b *
Explanation:
First command → Go to source site folder
Second command → Copy all files to new site folder
Third command → Move into destination folder
Fourth command → Assign proper ownership (MANDATORY)
4) Export Database from Source Site
In CloudPanel, go to:
Databases → Database Users → (a site) → Manage
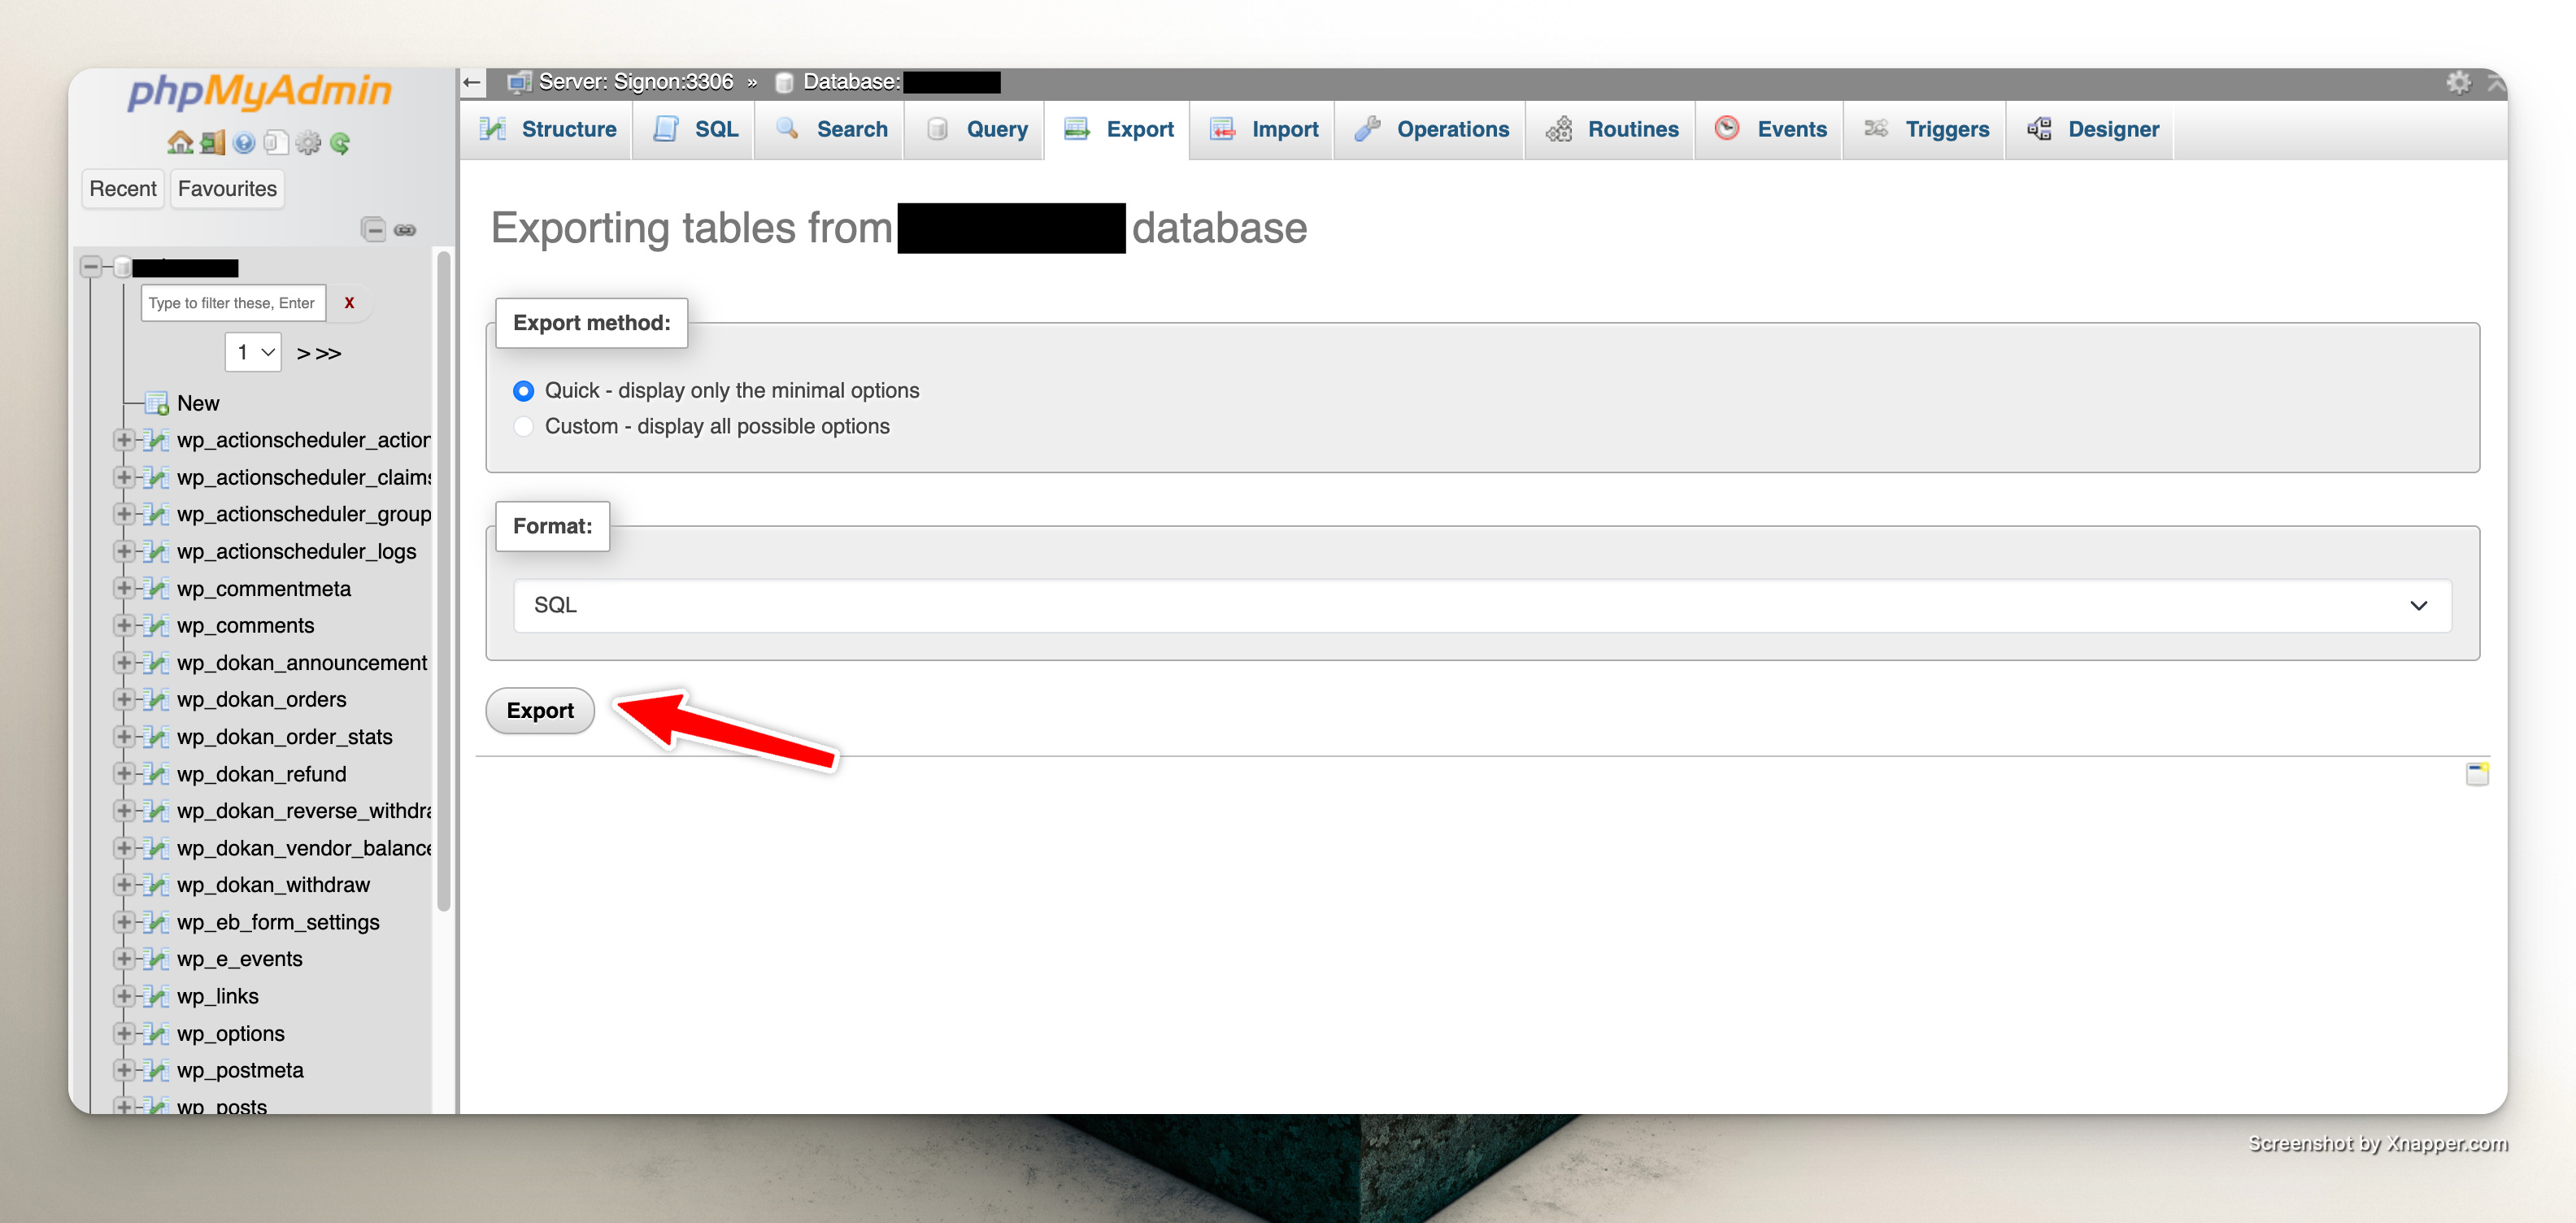
Open phpMyAdmin.
Click Export.
Export database as
.sqlfile.
5) Edit Database File
Open the exported
.sqlfile in a text editor.Use Find & Replace:
Find:
test-aReplace with:
test-b
Save the file.

6) Import Database to Destination Site
In CloudPanel, go to:
Databases → Database Users → (b site) → Manage
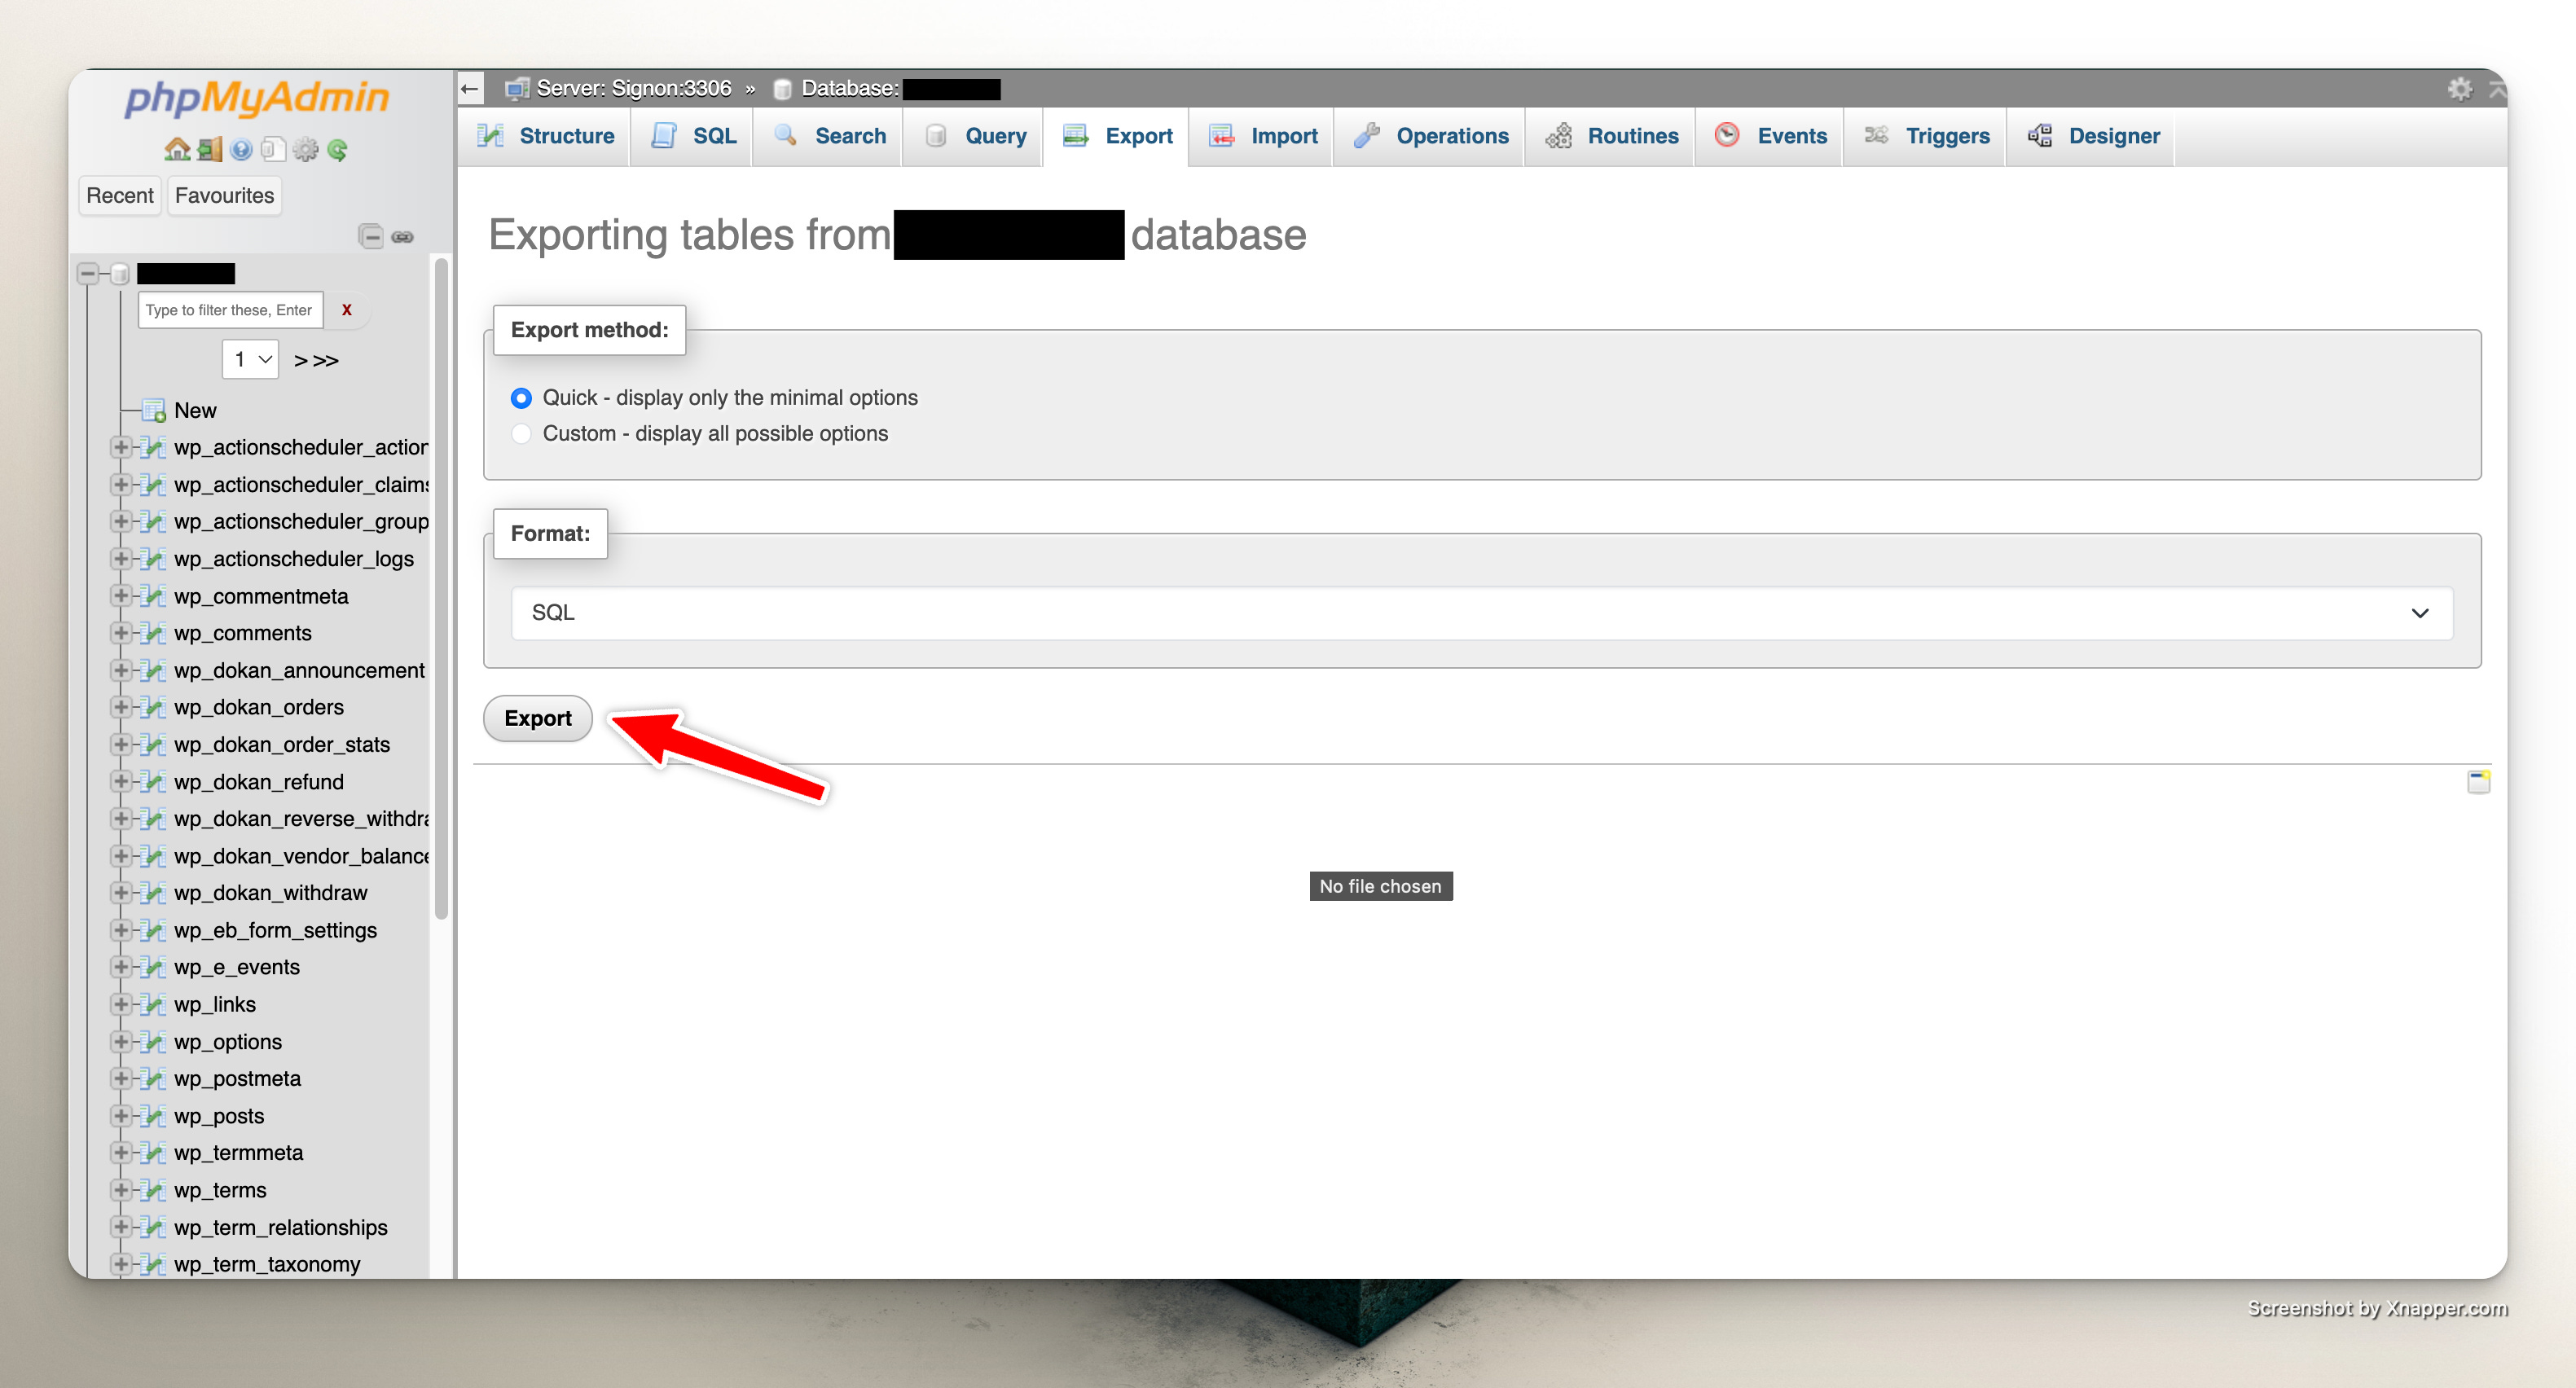
Open phpMyAdmin.
Select the database.
Drop all existing tables first.
Click Import and upload the edited
.sqlfile.

7) Update Site URL
In phpMyAdmin, open table:
wp_options
Locate these two rows:
siteurlhome
Change value:
https://a.test.com
➝ to:
https://b.test.com

8) Update wp-config.php
Go to:
CloudPanel → Sites → b.test.com → File Manager
Open:
htdocs → b.test.com → wp-config.php
Update:
Database name
Database username
Database password
(Use the credentials saved earlier)

9) Check DNS & Cloudflare
Verify DNS record for
b.test.comis pointing to correct server IPCheck Cloudflare (if used)
Clear cache if necessary
✅ Migration Completed
After all steps:
Visit
https://b.test.com
Test:
Admin login
Frontend pages
Forms
Plugins
Media files
If everything loads correctly, migration is successful.1
⚠ Important
test-a and test-b in the example above are placeholders only.
Before running the command, verify:
The correct Linux system user for the source site
The correct Linux system user for the destination site
The exact folder path under
/home/
To confirm the correct user:
Go to CloudPanel → Sites → (Site Name) and check the system user assigned to the site.
If the system user is different, replace:
test-a
test-b
with the actual usernames shown in CloudPanel.
Incorrect username usage may result in:
Permission denied errors
403 Forbidden errors
File ownership mismatch
Always verify before executing the command.